In the world of home renovation and improvement, hardwood floor fitting is a task that demands precision, the right tools, and a well-thought-out approach.
In this article, a professional installer walks through the process of installing hardwood flooring, from how to start square and choose the right nailer or stapler, marking floor joists, racking out the flooring, to the essential practice of glue-assisting the starter rows.
With the right preparation and strategy, your install will go smoothly the first time.
Hardwood Floor Installation Tips from a Pro
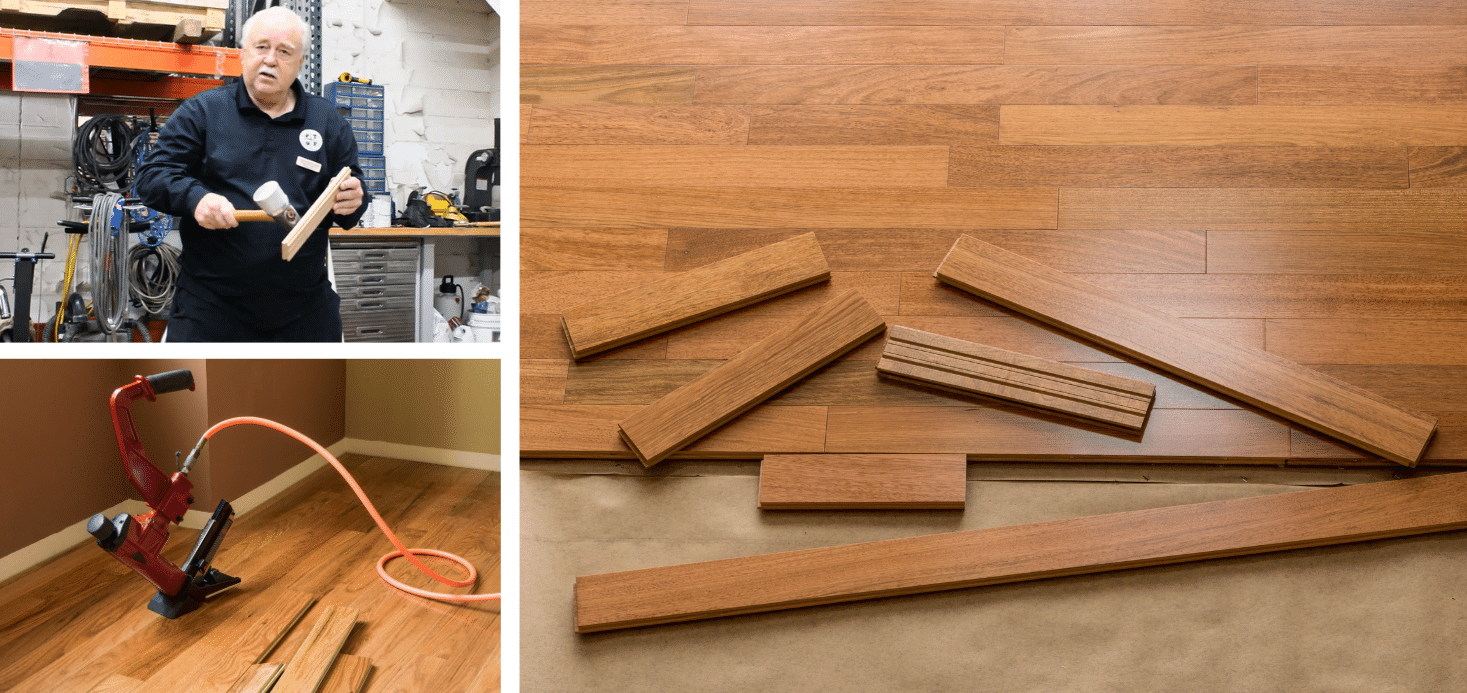
Doug Montgomery is a pro with 30+ years of experience installing hardwood floors. He used to own and operate a flooring business called Fabulous Floors. Now retired from installing, Doug generously shares his knowledge with our staff and customers.
When you want a picture-perfect installation, or you have a problem with your floor and there’s no solution in sight, you can count on Doug to help you out.
I asked Doug to share some tips about hardwood flooring installation. Read on for Doug’s hardwood flooring installation tips, tools, and techniques.
Start Square with an Exterior Wall and Chalk
A key principle to every flooring installation is to start off square.
Begin with an exterior wall, which tends to be the straightest area. Use strike line chalk and string to create your guideline.
A chalk line is easy to use and gives you a nice straight line. This will ensure you’re lined up with accuracy from start to finish.
Maintain the Correct Expansion Width
You will want to leave an expansion equal to the thickness of the flooring you’re installing. This gives the floor room to expand and contract.
For example, on a ¾” floor, you will stay ¾” back from the wall on both ends. Leaving a ¾” gap from the wall allows for expansion and contraction.
Choose the Best Power Tool and Fasteners for the Job
The first power tool you will need to begin an install is a finish nailer.
You will need a finish nailer at the start because the wall will be in your way, and no stapler or gauge nailer will be able to fit. Doug recommends the Powernail Power Palm for its ability to hit tight spots and use different gauge nails.
Use a Nailer and L-Cleats for the Most Secure Installation
Before choosing the right nailer or stapler to complete the rest of the installation, the big thing to think about is the kind of wood you’re installing. Is it solid or engineered? Wide or narrow? You will want to choose the right tool and fasteners for the material and subfloor you have.
- For ¾” solid hardwood, Doug recommends using a 16-gauge nailer and 2” L-cleat nails. A 2” cleat nail will go through the board and subfloor and embed ½” into the joist for the greatest holding power.
- For ½,” 1-1/2,” and 1-3/4” hardwood, he recommends an 18-gauge nailer or stapler.
- For 3/8” hardwood, a 20-gauge nailer.
Doug prefers nailers over staplers because nailers have superior holding power. When he was installing floors, he would sometimes put nailers and staplers to the test. He found that staples will hold the boards in place but not as well as L-cleats.
He also found that some hardwoods like hickory are so hard that staples won’t go through. Because each staple has two points, it won’t penetrate. Instead, you will jam up your stapler.
The advantage of a nailer is that each cleat nail has cut outs that secure it in place. Cleat nails by design will go through the hardest woods and hold better than staples. This is especially true for installing over an OSB subfloor.
Staplers are effective and popular tools for installing hardwood floors. But if you’re looking for the strongest hold possible, use a nailer.
Locate and Mark Your Floor Joists
Locating and marking the floor joists is important if you’re nailing through the wood plank, subfloor, and floor joists.
In most homes, the joists are 16” on center. You can usually follow that standard guideline to locate and hit the studs; however, be sure to find and mark the joists in each room before you install.
Joists run straight ahead in most homes, but every now and then you will encounter a room with a joist change. This is why it’s so important to find the joists in every room where you’re installing because they can be different from one room to the next.
You may even encounter a joist change occurring in the same room. For example, if you’re in a great room and there’s a fireplace, there’s a possibility that the area containing the fireplace will have a joist change.
Make sure to always install solid hardwood flooring perpendicular, across the joists. If you install the same way the joists run, the floor will suffer from the belly effect. The last thing you want, after you have finished a job, is for the homeowner to call saying there’s a big problem with the floor.
Rack Out the Floor
Once you have determined where to start the project, the tools you will need, and where your floor joists are located, you will want to rack out the flooring before you install it.
This is done after you acclimate the floor.
Typically, installers will start with 3 – 8 boxes of flooring completely open. We recommend our installers get at least five boxes open to have access to a wide range of boards and lay out the floor exactly as they’re going to install it.
Glue-Assist the Starter Rows for a Solid Foundation
Glue-assist means you use glue to support the fasteners for extra holding power. The first three rows you install (the starter rows) are essential for a smooth installation. When you glue assist the starter rows correctly, the rest of the install becomes easier.
Use a caulk gun to glue the starter rows with polyurethane-based glue, such as Loctite Premium. This type of adhesive has elasticity, letting your floor breathe and move, and yet it’s strong enough to provide a steadfast hold.
Read about the best wood floor adhesives.
Next, use your finish nailer to nail down the plank. You will want to drive a nail through each joist and 6”- 8” between each joist. You will nail through each joist and once in between each joist using your finish nailer for the first two or three rows of flooring.
The Correct Nailing Technique for Joining Boards
When you are joining two separate boards on the same row, you will want to drive a fastener into the tongue at an angle, so it goes through the substrate.
Stay within 2” of the butt end, which is where the tongue and groove meet. You don’t want to nail more than 2” down from the butt end because the gap will cause movement in the floor.
Once you have finished the first row, continue with the glue-assist method on the 2nd and 3rd rows. You will do the same thing as you did for the first row, but you won’t have to face nail.
After laying your starter rows using the glue-assist method, you can switch to a gauge cleat nailer because you will be far enough away from the wall. If you use a cleat nailer too early in the installation, you will mark yourself out of square.
Once you have installed at least three rows using glue assist and your finish nailer, you will be set up for a beautifully installed hardwood floor.
Summary
The process of hardwood floor installation is an intricate mix of choosing appropriate tools, preparing the floor, and implementing exact techniques. The collective efforts of these steps result in a beautifully installed, durable, and lasting hardwood floor. Remember, the ultimate objective is to install a floor that not only looks aesthetically pleasing but also stands the test of time.
Have a question about installing hardwood floors? Feel free to reach out to Doug in the chat or through our contact form. You will find that he’s happy to help or chat about flooring. Doug is one cool cat. He can help you with your project or steer you in the right direction.