If you think your old wood floors are a bit dull and beaten up, it might be time to give them a good buff. Buffing your old floors can bring them back to life, and the best part is you can do it yourself. This procedure of restoring old floors is relatively cheap and easy when compared to other methods, such as sanding. It’s also a lot less messy!
In the following article, we will walkthrough step-by-step how to buff a wood floor with a few pro tips.
But first, you need to work out whether it’s necessary to buff your wood floor.
1. Determine If Your Wood Floor needs Buffing
The first step for most DIY jobs is working out whether buffing your floor is necessary. When considering whether to buff your floor, you need to think about what it will and won’t accomplish. Buffing will lift light marks or scratches that have penetrated the thin protective layer of your flooring. But you can’t remove any deep scratches or imperfections that are deep in your flooring. To remove these sorts of marks, you will need to sand your floor.
Pro Tip: If you’re unsure whether your floor needs buffing or not, take some photos and head over to a local flooring supplier. They’ll be more than happy to help you make your decision and pick out the right items.
2. Select Your Materials and Tools
The next step after determining your floor needs buffing is to select the materials and tools you will need. The first thing to consider is what type of buffing machine you will use.
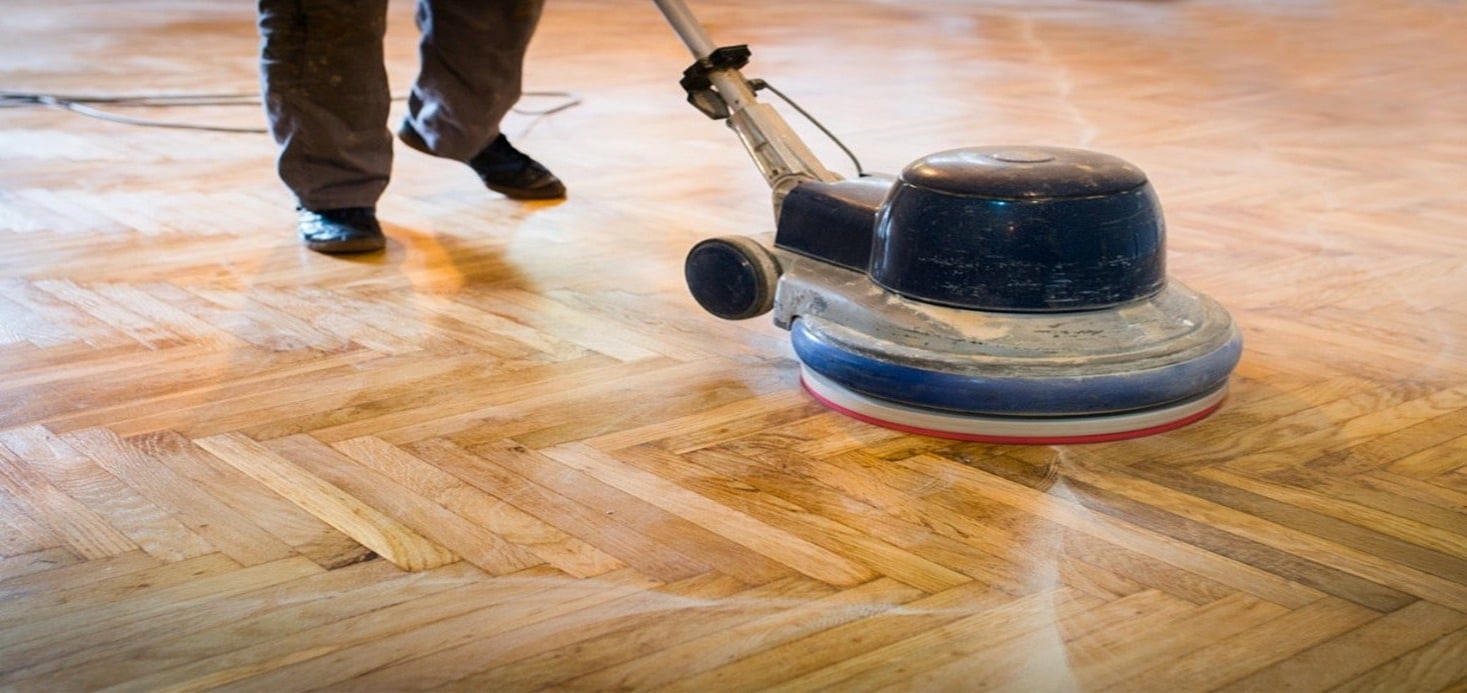
There are two types of stand-up buffing machines: Spray buffers and dry buffers. A spray buffer is used with a solution that’s either mopped or sprayed onto the floor before buffing. A dry buffer uses no liquids and relies solely upon its fast rotating speed to buff the floor. I strongly recommend using a spray buffer because they’re much easier to handle. Dry buffers should be used only by professionals.
Once you have rented a buffer, it’s important to also pick up some buffing pads and finishing solutions. Make sure both the pads and solutions are high quality as this will make your job much easier. Remember, there are plenty of finishing solutions out there, so take your time and pick one that’s right for you.
Pro Tip: I strongly recommend buying a quality microfiber mop to apply your solution. This will ensure even coverage and save time and mess.
3. Prepare the Room
The first step to preparing your room is to completely clear it out. Remove furniture, lift your curtains, and remove any floor vents, door closers, and door stops. Buffing machines can cause a lot of damage if you don’t have a completely clear working space.
Once you have a clean area, you will need to give your floor a good clean. The best way to do this is to vacuum or sweep the room and then mop the floor with warm water. Make sure to allow the floor to dry before moving on.
Pro Tip: Once you have removed all your furniture, install some felt floor protectors on the legs of your tables and chairs. This will ensure you don’t scratch the floor when re-installing your furniture. If you already have felt floor protectors, give them a quick check to ensure they’re still good.
4. Apply Your Buffing Solution
Next up, it’s time to apply your buffing solution. Give the solution a good mix and then apply it to the floor using your mop. Ensure you cover the whole floor with a thin and even layer. If you’re looking for an extra glossy shine, you can apply one layer of solution, buff the floor, and then go back over, applying a second coat.
5. Buff the Floor
Before jumping straight into buffing the floor, it’s important to have a plan. Know where your power is coming from and also where you will start and finish. I recommend finding a power source and working back toward it. This will keep your power cable behind you and make the job easier.
Using a smooth sweeping motion, gently push the buffing machine across the room, working from side to side. Be careful not to push too hard or stay in the same spot too long as this can cause burn marks. Be sure to stop now and again to check the condition of the pad. If it looks worn, clogged, or broken, replace it with a fresh one.
Pro Tip: Remember not to push down too hard on the buffing machine. Allow the machine to do the work and gently guide it in the direction you want it to go.
6. Allow Drying Time
Once you have completed buffing your floor, allow at least 24 hours before refurnishing. Light foot traffic after one hour is fine, but it’s best to keep off the floor as much as possible for the first 24 hours.
After 24 hours, you can carefully refurnish the room.
Summary
As you can see, buffing a wood floor is relatively easy. It’s important to first check whether buffing the floor is going to achieve the results you’re looking for. If you have a lot of deep scratches it may be best to sand your floor instead. If you decide to buff your floor, follow the five steps above for the best results.


